Create and send a Message
NetVendor Maintenance (NVM) enables sending messages to residents and team users easier than ever, As long as your target recipients (including their contact info) are loaded into NVM, we can use their contact info for sending out messages via email and text (SMS).
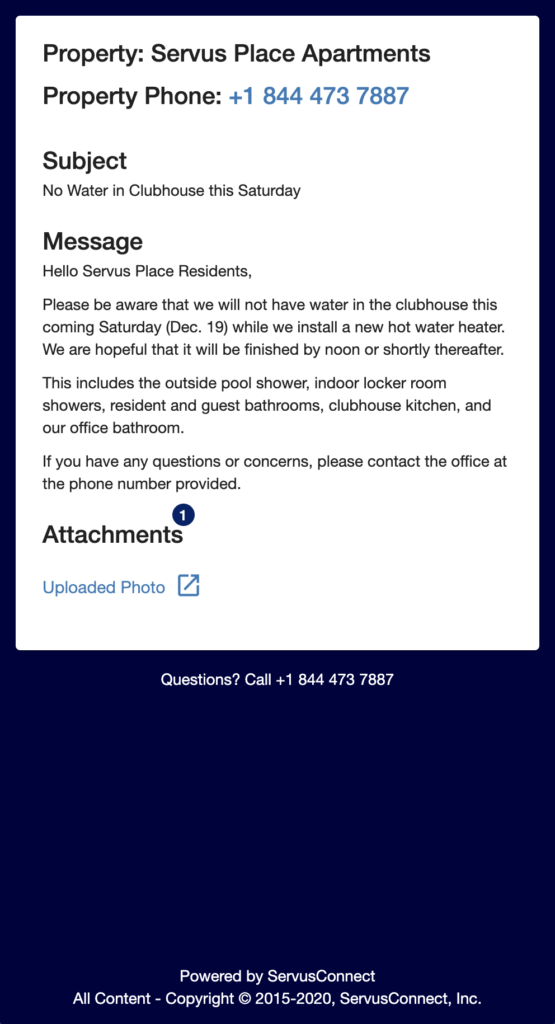
Here are the basic steps to create and distribute a new Message:
- Add a Subject
- Add some text to the Message body
- Select the Recipients by adding the entire Property, Buildings, Units, or Specific Residents/Prospects/ServusConnect Users (coming soon)
- Save Draft or Send Now
- Schedule Send for a future date & time (Optional)
- Add an Attachment (Optional)
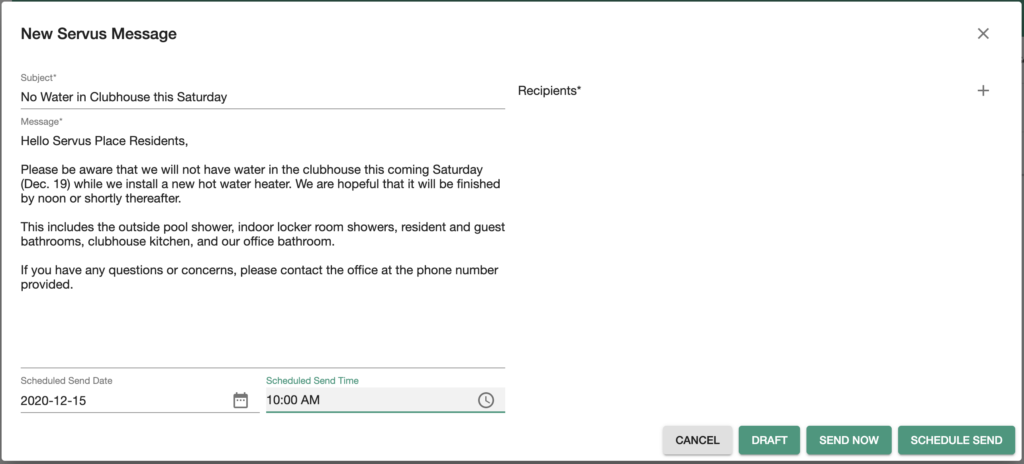
Add a Subject
The Subject of the Message is included in the initial notification to the Recipient, so keep the Subject short but informational.
Here is an example of what a text/SMS looks like:
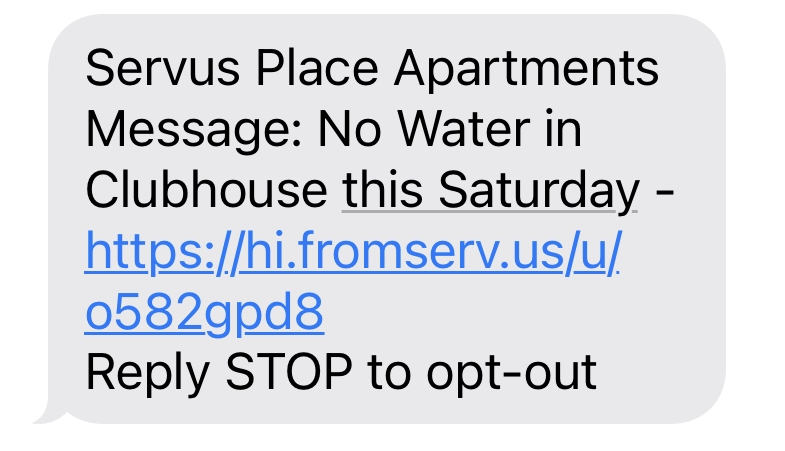
The link in the Message will take the recipient to the page shown at the top of this article.
Important Note: Long Subjects will result in additional charges by the text messaging platform, so please create with care… Thank you in advance from NetVendor.
Add some text to the Message body
This section will allow you to add more details to the Message, which can also include things like:
- Special instructions
- Important dates
- Links to other websites
This information will only be available to the Recipient if they click on the link and view the Message. Reference the example shown at the top of this article for how this looks to the Recipient.
Select the Recipients
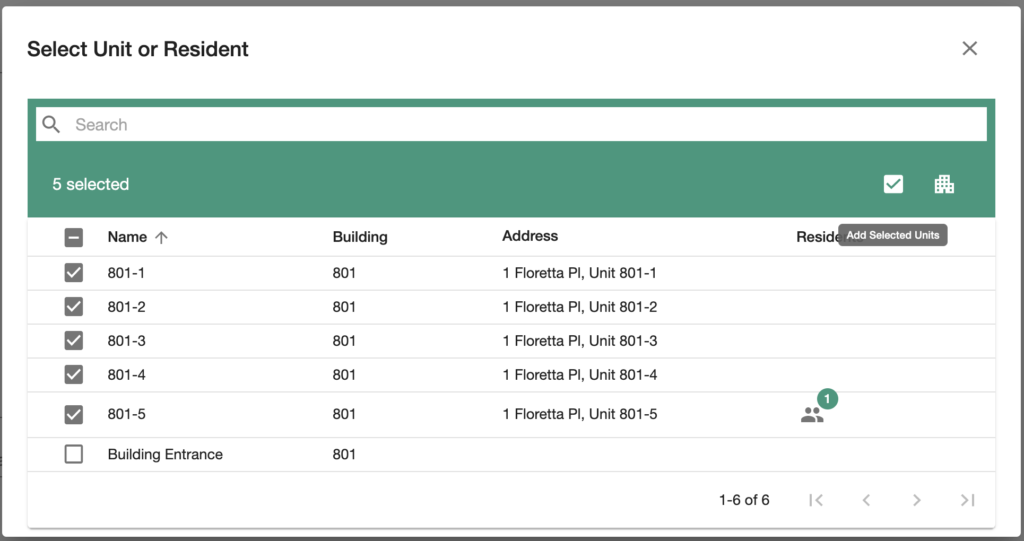
This is the most important aspect of setting up a new Message. The Recipients can be selected by selection of an entire Property (click on building icon), selection of specific Units (e.g., Units that reside in a specific Building), or by selection of individual Residents.
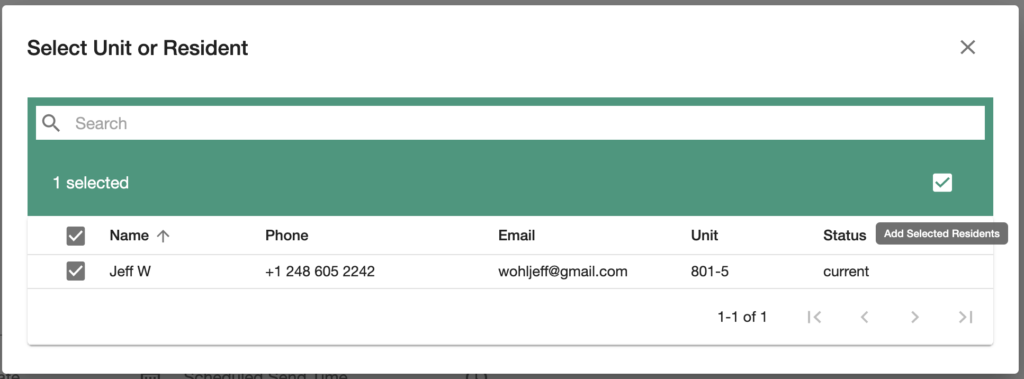
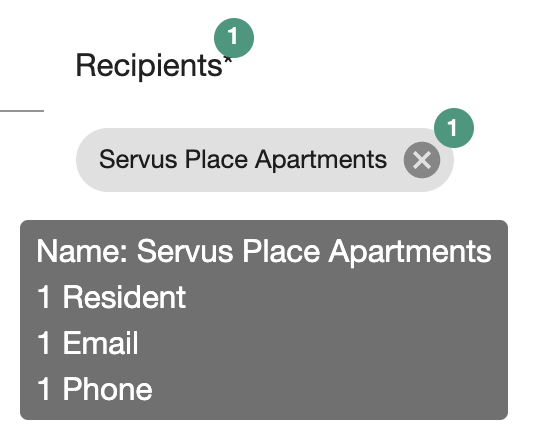
Save Draft or Send Now
Pressing the “Draft” button will save the Message for future editing. This may be helpful if you need to work on the Attachment before you are ready to send the Message out to your list of Recipients.
Pressing the “Send Now” button will deliver the Message to each of the Recipients that were selected.
Schedule Send at a future date & time (Optional)
Use this feature if you would like to Send the Message to the Recipients at a future date & time. When creating or editing the Message, just specify the date & time for sending and press the “Schedule Send” button instead of the “Send Now” button.
When the date & time comes, the Message will be sent to the list of Recipients. This may be helpful if you need to work on the Attachment before you are ready to send the Message out to your list of Recipients.
Add an Attachment (Optional)
This feature is helpful if you are trying to replace the manual process of walking around your property and using door hangers or placing flyers in the mail slot or under the doors of your Units.
Either during Message creation or after the Message is created (Drafted, Scheduled Send, etc.), just use the paperclip icon to select the Attachment from your computer.
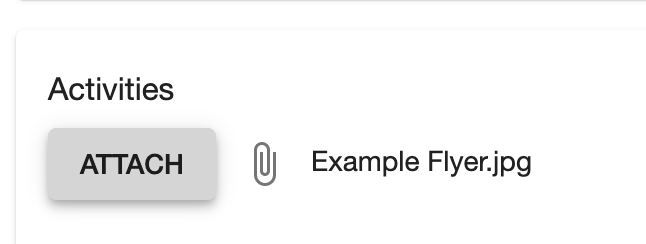
Note: If adding after creation, you will also need to press the “Attach” button.
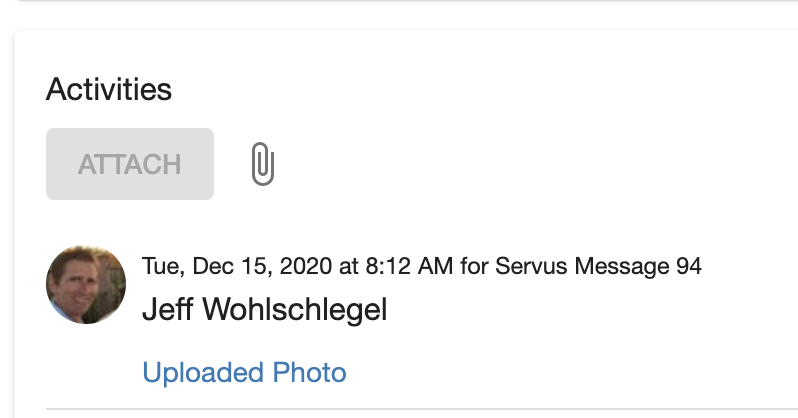
Once an Attachment is connected to the Message, it will be available to the Recipient, as shown in the example at the top of this article.
While additional Attachments can be added at any time, we recommend to add them before the Message is sent (by using Draft or Scheduled Send) to avoid any confusion by the Recipients. It may also be useful to add something like “Reference attachment for more info” to the Message body to indicate that more information can be found in the Attachment.
That’s it! We are excited to get your feedback on what you use Messages for.
